Tuesday, December 6, 2011

Black

Many of you may be surprised about the pic I am about to post. My nails have been trashed as I have been working in the warehouse by myself for about a week. I've had some serious breaks and have cut them all down.


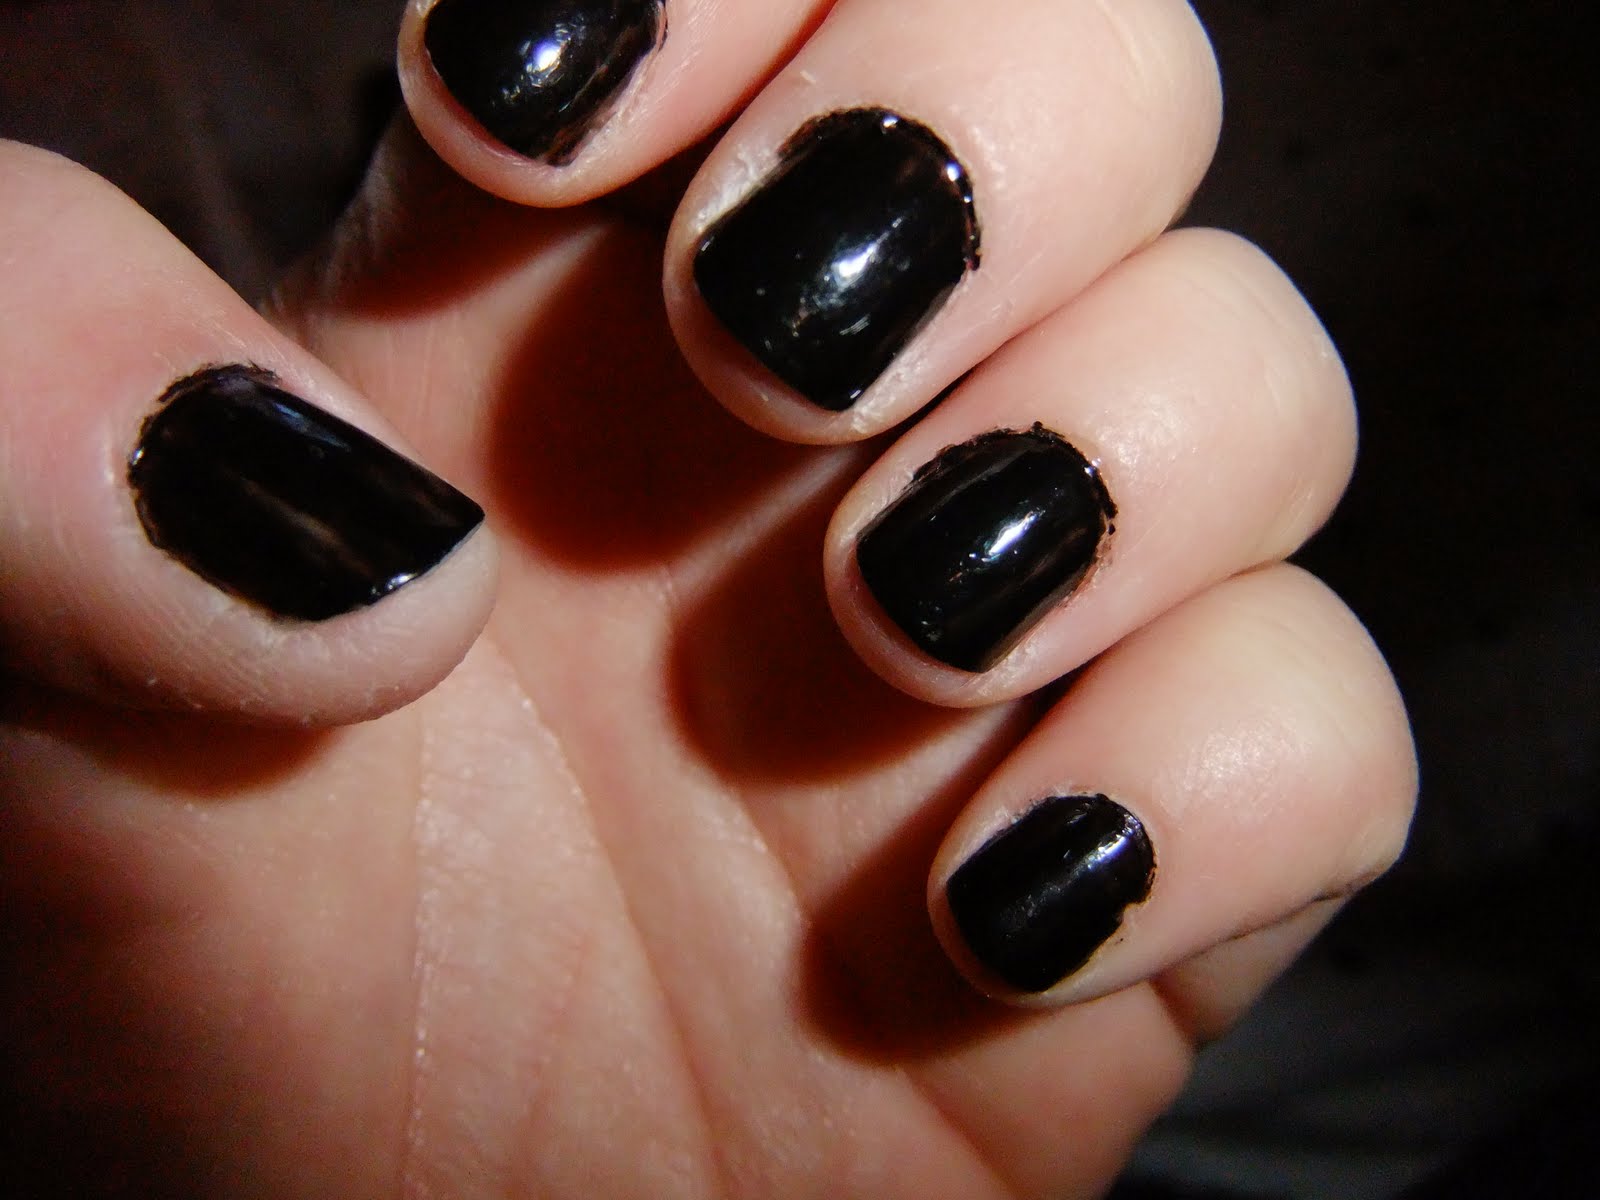
My nails are the shortest they have been in a very long time. It feels very uncomfortable and texting is difficult. I'm posting this anyway because I want to talk about how i painted my nails today. Normally, I am not one of those girls who waits til the last minute to do her nails. I rather leave the house without any make up on then with no nail polish on. Usually, I plan my nail colour and/or art in advance. Not today. 15 minutes before my ride came today I decided to put essie's good to go rapid dry top coat to the test.


I didn't have anytime for art or anything remotely complicated. I choose basic black. It's simple and kinda suits short nails. I did one quick thick coat in LA Girl's Blackout (NL 395) (on the left) waited a minute or two and put on essie's new top coat (packaging in the middle and bottle on the right). I was a bit disappointed. it did not set nearly as quickly as seche vite. when my ride did show up, i was only really good to go because i used seche vite on top of everything. so in a real world test, when you're pressed to get your nails done quickly, this top coat just doesn't beat seche vite. i think i may never find anything as good as it. that being said, i think the essie product did dry the colour underneath quickly. normally when i use seche vite over polish that is still damp, it smudges. This time it did not. as soon as the seche vite was dry, all the polish was set. didn't even hurt the polish when i put on my coat. so right now, i don't think i'd recommend this top coat over seche vite. but since i paid for it, and it's not the cheapest, i'll probably give it another try.

Sunday, October 23, 2011

Happy Halloween!

Well, I'm back! Over the last few months, I've had quite a bit of bad luck when it comes to technology. I have had to replace my laptop, cell phone and digital camera. It's been expensive and, frankly, frustrating. Unfortunately, I have no pictures of the nail designs I have sported over the summer. But now that I finally have a new camera, things should be getting back to normal.

I have two designs to show you today. The first one I'll show you is what I'm currently wearing, and is, of course, for Halloween. It's very simple design, similar to other patterns I have had on my nails before.

The orange in the background is Wet N Wild's 222C or 9.0.2.1.Orange (don't you love the name!!). It's a perfect Halloween orange with lots of glitter packed in. It took 3 coats to get the colour this vibrant. Then I used a striper in black to do the vertical tip. Any black polish would work for this. I like using the stripers for this kind of work, because the line turns out much sharper then using a regular black polish brush. Then I went back with the orange glitter and did a quick coat over the black. It really makes everything pop. Perfect for Halloween, and not as laborious for those of us who don't always have hours to spend on our nails. (As it seems like I never have enough time anymore :( ) This took me maybe an hour and that was only because I was waiting for the coats to dry completely between layers. I want this polish to last all week.

This is what I had on my nails last week:

I really didn't like wearing this design. Far too girly for me. Which is why I chose the colours that I did, but in the end it went beyond what I was trying to achieve. This design Is based on one that cutepolish posted a while back. Her colour choice is much more classic, in just simple black and white. First, paint your entire nail in the colour of your choice. In my example, I have used Sally Hansen's Xtreme Wear in Fuchsia Power. Then wait until your nails are completely dry. This is essential. To achieve the curve in the nail polish, apply reinforcements to the bottom part of the nail, similar to how you would use those french manicure stickers. If the bottom layer is not completely dry, you;ll ruin the finish. Then, paint the purple colour over top. I did a thin coat, and I liked the play between the 2 colours because the top coat wasn't completely opaque. You see the pink coming through from underneath the purple. Oh, the purple I chose was same brand as the pink in #170, Deep Purple. (Which looks fantastic on its own, btw.) Then I just used my nail dotter to add the spots. Like I said, the look is far too much for me. What do you think?

Wednesday, May 25, 2011

Colourful Nails

For the last month or so, I've had very little time for my nails :( . I've been wearing clear polish only. So not like me... then, 2 days ago, something awful happened. I was painting my nails in the kitchen when my roommate and I heard a crash. Sounded like it came from my room so i went to investigate and found the top drawer of my dresser had fallen out onto the floor. I was in no mood to clean it up, so i avoided it and decided to fix it later. when I did go back I found my entire nail polish collection on the floor, including on smashed bottle of Rimmell's 60 second dry polish in a shade of green, which had gone right into the carpet. I am still trying to get the resultant stain out of the carpet. Erg. Needless to say, I am not very pleased. And that's kinda how my relationship with nail polish has been going lately.

But I am struggling through! Finally, I have a manicure that I think will last. I know Easter has past a while ago, and that's what this looks like, but i really couldn't decide on one colour, so I chose 5 instead!


The colours from right to left are: Avon's nailwear pro in sunshine, l.a. colors' color craze in atomic, Sally Hansen's Hard as Nails Xtreme Wear in Deep Purple, then same brand in Fuchsia Power, and finally OPI's Suzi Says Fung Shui. I love the combination of all 5 colours. They look so happy together, don't you think? I did a coat of China Glaze's fairy dust on top. I love fairy dust! It is one of my favorite polishes of all time. And it really gives a plainer manicure an extra kick.

Does anyone have any special requests? Send me an idea, and I'll see if I can pull it off.

Monday, March 21, 2011

Paddy's Day Nails - Dots!

For Paddy's Day week this year I sported 2 nail styles for the week. This is the first one I tried. I decided thst for the actual day, this was just not enough sparkle and shine so I did something entirely different the night before (I'll post about that one tomorrow or the next day.) For this design, I just painted a green background and put a whole lot of white dots on top. Loooooove the dotting tool! I did my nails in well under 2 hours this time. Amazing for me!

The background is American Apparel's Hunter (#36504), the dots are just some basic white I have lying around. I think it's Sally Hanson. Any white should work fine. I find they're all about the same. Over the top is a layer of Sally Hanson's Diamond, which is aa clear polish with micro glitter in it. You can't really see it in the picture but it added so much in person. I love that polish. It is my go to polish when my nails just need a little more interest.

I gotta mention the American Apparel line. I've been dying to try their polish for ages. One If the bloggers I follow uses it in almost every design she does and I wanted to see how it stacks up. Didn't think I'd get to try it until the summer when I go away... but there's an American Apparel in the mall now!! Wee!! And it is great! the polish applied evenly and dried super quick. Both times I've used it, I could have gotten away with one coat if I hadn't have slipped up so much in application. Anyhoos, I highly recommend it!

Monday, February 14, 2011

happy valentine's day!

i'm not normally a hearts kinda girl. but for some reason i couldn't resist the temptation to have valentine's day themed nails this year. i saw cutepolish's new video and decided it wasn't too too challenging. it's the first time i have attempted to sponge polish onto to my nails. i don't think i have the technique down quite yet, so i'm not totally happy with the results, but i'm not completely discouraged from trying it later on. i saw a video a while back on creating a gradient using a sponging technique and i might try that this weekend. if i dont decide to try harry potter nails, that is. we'll see!


these are all the polishes i used on my nails today. i didn't realize before how much sally hanson products i had. it's really a good quality yet affordable product. i've had the pink bottle so long that the cover had dried on and i had to get my roommate to take off the top for me! but it's still good!

Here's what i did:


and, yes! that is a piper's ad in the background.

here's how i did it:

Sunday, February 13, 2011

New tools and review

last week i didn't post when i painted my nails cause i didn't think anyone would care about a plain solid colour... kinda boring. but i'm going to post a pic now to show you how well the polish lasted after a full 7 days on my nails. this polish went the distance!

as you can see there is only a tiny bit of tip wear. and i worked for 5 out of the 7 days i had the polish on and let me tell you, my job is not easy on my nails. the colour is opi's suzi says fung shui. i absolutely love it! it came out last year as a part of their hong kong collection. oh, i should also mention that i use a pretty good top coat: seche vite. it definitely makes your polish go the distance. i kinda forgot to put topcoat on one hand of my last design and you could really tell the difference. the left hand chipped waaaay before the right hand. i should've taken pics to show the difference. oh well.

in other news, i made an awesome discovery at michael's yesterday. i went in to buy a fine tip paintbrush to do a special valentine's day design on my nails (to be posted tomorrow!) but i had a look around some of the other sections when i spotted an embossing toolkit. these embosser tools look exactly like nail dotters! and that's exactly what im going to use them for. sooo excited. and they were definitely waaay cheaper than "proper" nail dotting tools. i got a pack of 3 tools with various sized dots for $7. weee. can't wait to try them out.


these are the tools and the new paintbrush i got in their packaging. here's a closeup of the tools themselves:


come back and check again tomorrow. i'll post pics from my special valentine's day polish!

Saturday, January 29, 2011

new design

when i started painting my nails this evening i had a completely different idea for the design altogether. origanially i attempted to have a v shaped french manicure centred on the tip. fortunately, i soon gave up the notion of perfectly even polish and, instead, got a wonderfully asymmetrical design!


to get this look i freehanded the black tips, using more polish on one side of the nail than the other. then i took my purple striper polish and traced the edge of the black polish. i had to do this a couple of times to make the purple polish stand out a bit more. (although it still doesnt stand out as much as i'd like it to.) to create the flowers i used a toothpick dipped in polish to make small black dots in a circle. then i dotted the purple in the centre. for a little bit more interest, i added a small black dot to the centre of the purple. here's a closer look:


i find freehanding tips so much easier then trying to use those stupid french manicure stickers. all it takes is a bit of patience and a lot of practise! i'm still getting better at it... look at the mess i made on my cuticles! luckily nail polish doesn't stick to skin very well so those mistakes with wear away pretty quickly.

Sunday, January 23, 2011

free man!

i wish i had thought of the idea for this nail art myself. i am such a nintendo girl that it is so fitting. my phone even occasionally buzzes with the sound of a 1-up when i get a text!


And this is how you achieve this look:


thanks cutepolish!

Thursday, January 6, 2011

sparkle and such

i've been terrible so far this year. I have failed to take one picture of wonderfully manicured nails to share. for new year's i did decide to go with the glitter, but not over the top, as such. more important to me this year was to match the nail polish colour to the colour of my shirt. and i amazingly managed to do it. OPI's Blue My Mind matched perfectly! i couldnt believe it. i did a french tip in the blue with a silver fine grain glitter stripe underneath. i coated the whole nail afterwards with a subtle glitter to give it a little bit more interest. wish i had a pic. unfortunatly, i did them in a rush and used a little too much polish so they chipped very quickly. but lesson learned: apply thin coats of polish for a more lawsting manicure!

currently my nails are sporting a super blinged out look. i have a pale pink base coat on the bottom (i forget the specific colour, but it is from sally hanson's extreme wear) and scrapbooking glitter on the top. in person they look awesome. i can't capture the brilliance in the photos. and they also looked way better when i first did them. erg! i gotta stop forgetting about my camera! anyway i'll post the pic regardless:


i really wish i had pink glitter to use on my nails. the silver is great, but i think with the subtle base coat i chose, pink glitter would go together much better. anyone know where i can get some?

anyway, i think it's about time i try my hand at water marbling again... wonder what i'll comee up with this time...